Thursday, July 29, 2010

Picture this

Yesterday, I checked another item off my to-do list and finished up my gallery wall project.

Remember what the wall looked like before?


Here’s the big after!

I like it so much better! Let’s take a look at how the frames went from mismatched to beachy!

Before – serious looking black:


After – perfectly shabby white:


Before – dated roses:


After – beachy blue:


Before – yellowed white:


After – fresh and crisp:


Before - pale blue with a few chips:


After- Lovely darker blue:


Before – very fancy silver:


After – Beach cottage white with a fun mat:


Before – no frames:


After – dollar tree frames with a two coats of blue paint:


Before I went putting nail holes in the wall, I played around with some ideas for how I wanted to arrange the frames. I changed this arrangement slightly to work with some nails that were already in the wall.


I’m so happy I made this simple change! It only cost me two bucks, and it ties the hallway to the living room. An added bonus is how much more roomy the stairway feels without those shelves jutting out.


Are you putting off a simple change that will make a big difference? – Go do something about it! You’ll be glad you did!

I'm joining Frugal Friday @


<3
Hattie

Wednesday, July 28, 2010

halfway there!

Operation bookcase clean-up has made for a couple of busy days around the roost! I’m about halfway through this massive and very dusty project, and the shelves are starting to look the way I envisioned. Because everyone loves a good before and after, let’s take a look back at the living room before I got myself into this mess:


Big bookcases – love the newspaper baskets; really don’t like the big shelf full of board games. Note the typewriter table beside the sofa - I’ve never been crazy about this table, but it fit well in the space.


Ugly brown bookcases beside the sofa and on the steps.


White bookcase full of children’s books.

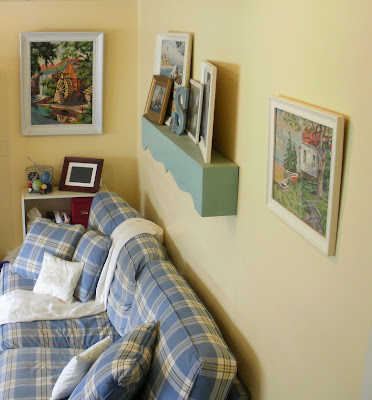
Here’s how things look now, after moving nearly every book and painting the brown bookcases:

The view from the top of the steps. I switched the typewriter table for one of the freshly painted bookcases.

The shelves hold tissues, the remote basket, and our newly organized CD boxes. I filled a wire basket with mini pool balls and croquet balls and used our digital photo frame to hide one of the surround sound speakers.

On the other side of the sofa, I switched out a bookcase for the $12 end table we picked up a few weeks ago. I’m really not sure how/if I should accessorize this table – suggestions please!


The other white bookcase went back on the stairs.

I’m thankful the big bookcases came with adjustable shelves, because I moved nearly all of them!

While the top two shelves on each side are pretty much done, I have a lot of work to do on the lower shelves. The plan is to make 12 more newspaper baskets to hold the rest of our DVDs and paperback books. I also plan to use a drop cloth and nail head trim to make a skirt to hide the large bottom shelves. Those board games and paperbacks will finally be hidden from view!

I removed the dust jackets from all my hardback books and arranged them by color.


I’m really pleased with how these two shelves came out!


On this side, I plan to make the racquet press into a frame.


Finally, I rearranged some of the books on the other bookcase as well.


I love that after three years all of my bookcases finally match!


I still have a lot of work to do, but it’s nice to see things starting to take shape.

Have you tackled any big projects this summer?

Linking to the fun at Gina's!


<3
Hattie

Monday, July 26, 2010

Making Space

Remember those bookcases I painted last week? After a close inspection of the fine print on the primer can, I discovered that while you can start painting an hour after priming, it is recommended that you allow the primer to cure for 7 days before you start using the furniture. Not wanting to chip two layer of primer, two layers of paint, and several hours of work -  my living room has looked like this for the past week:


Pristine and empty bookcase doing it’s curing thing,


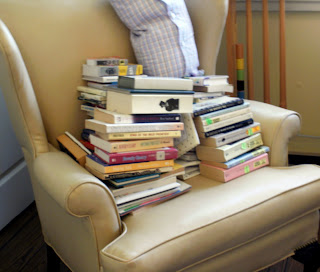
books piled in the wing chair,


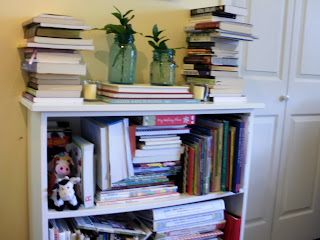
books crammed in the already white bookcase and stacked somewhat precariously on top!


And a huge pile of CDs on the steps.

I could deal with most of the mess, but the CD’s got to me. I really didn’t want to clutter up my fresh, white bookcases with stacks of ugly plastic jewel cases. Good thing Target came to my rescue! I fell in love with these Memorex CD file boxes - it didn’t hurt that they came in red!


For $14.99 a pop, they use a hanging file system to store 80 CDs each.


A few hours, some alphabetizing, and a few streaming episodes of Studio 60 later, and I had this huge bag of empty jewel cases…

And two cute little boxes of neatly organized CDs.


Don’t ya just love it when you can make more space without sacrificing style? I know I do!

What’s your best space-saving tip?

<3
Hattie

Thursday, July 22, 2010

blueberry blast

Yesterday, I took a little trip up the road driveway for some blueberry picking at my parents’ house. This year they have a bumper crop of organic berries and don’t want any to go to waste.


To keep out the critters, my dad and brother constructed this blueberry house from PVC pipes and netting.


The base is wooden edging


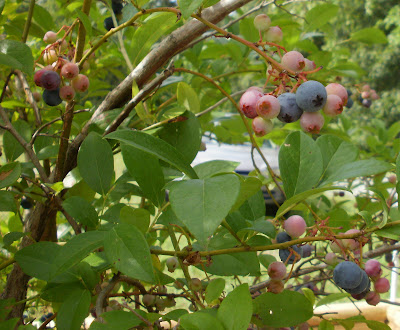
Zip ties hold the netting to the PVC frame. It seems to be working great, because the berries are plentiful and gorgeous.


Yum!


The ripe berries are blue (well, you knew that part already!), yield slightly to the touch, and fall easily from the stem.


If you have to tug to get the berry, it’s not ready yet.

Now, what to do with all those berries? My mom suggested that I freeze some for the winter.


To freeze berries:
- Remove any stems or blemished berries

- Wash berries well

- Line cookie sheets with paper towels or clean dish towels

- Spread berries in a single layer on towels and allow to dry thoroughly

- Place berries in freezer bag and remove as much air as possible.

- Berries will freeze nicely and not clump together

Freezing is great, but the instant gratification of a warm, gooey, blueberry treat is also hard to pass up.

I recommend:


Blueberry Betty


Blueberry Bread


And Super Blueberry muffins.

I made these for the first time yesterday from a recipe my mom found in the local paper. They are a-mazing!

You Need:
- 1 and ½ cups flour
- ¾ cup sugar
- ½ teaspoon salt
- 2 teaspoons baking powder
- 1/3 cup vegetable oil
- 1 egg
- 1/3 cup milk
- I cup blueberries

Crumb topping:
- ½ cup sugar
- 1/3 cup flour
- ¼ cup butter
- 1 and ½ teaspoons cinnamon

For the muffins:
Preheat oven to 400 degrees. Line eight muffin cups with liners and fill any remaining cups half-full with water. In a large bowl, mix flour, sugar, salt, and baking powder. Place vegetable oil in a one cup measuring cup and add the egg and enough milk to fill the cup. Add to the dry ingredients and mix until just blended. Fold in blueberries. Fill each muffin cup to the top with batter and sprinkle with crumb topping.

Crumb toping:
Mix sugar, flour, butter and cinnamon with a fork or pastry blender until crumb topping forms. Makes enough topping for two batches of muffins.

Bake muffins for 20 to 25 minutes.

What's you favorite summer berry?


I’m linking this to Gina’s fun party!

<3
Hattie