Showing posts with label cooking. Show all posts

Thursday, October 21, 2010

EarthPan Update

Remember my free Earthpan I reviewed back in August? I thought y’all might like to see how it’s holding up after over two months of heavy use.


After cooking lots of eggs (over easy and scrambled with cheese), chicken, shrimp, taco meat, pancakes, and veggies, I’m happy to report that the pan still looks brand new!

I will admit that it’s not the best for flipping over easy eggs, but it does just fine with pancakes. I love that I haven’t had to buy non-stick spray in forever because the pan doesn’t need it. It cleans up beautifully, heats evenly, and is making this cook pretty darn happy!

I would definitely add to my EarthPan collection in the future!

What’s your favorite green cookware? Please spill the beans!

<3
Hattie


Wednesday, August 18, 2010

Adventures of an EarthPan

Remember that EarthPan I promised to review? Well, it arrived last week right before I headed out of town. I took it for its first test run yesterday and – wait for it – filmed the experience! Please be kind as this was my first time trying to film anything with my little camera!

My EarthPan adventure from Hattie Smart on Vimeo.

Things I like about my new pan:


- This thing is hefty! I can tell it’s well made.
- You can cook over a lower heat with the same results.
- No icky Teflon!
- It cleaned up very easily with a little dish soap.

Things that will take a little getting used to:

- You can’t put it in the dishwasher. Not that I have a dishwasher, but one day I will!
- Remembering not to use non-stick spray.
- The pan itself is pretty non-stick, but not 100%

Overall, I’m very happy with the way the pan performed. In my opinion, eggs are one of the messiest things to cook in a pan, and I think the EarthPan without non-stick spray did just as well or better than my old non-stick pan with spray.

I’m going to make this my go-to skillet, so it will be getting a lot of use. In a few months I’ll let y’all know how it’s holding up to my kitchen abuse! Have any questions about the pan? Ask away!

Note: CSN Stores provided me with the EarthPan for review purposes. They did not compensate me in any additional way. The words and opinions in the review are mine alone.

<3
Hattie

Wednesday, August 11, 2010

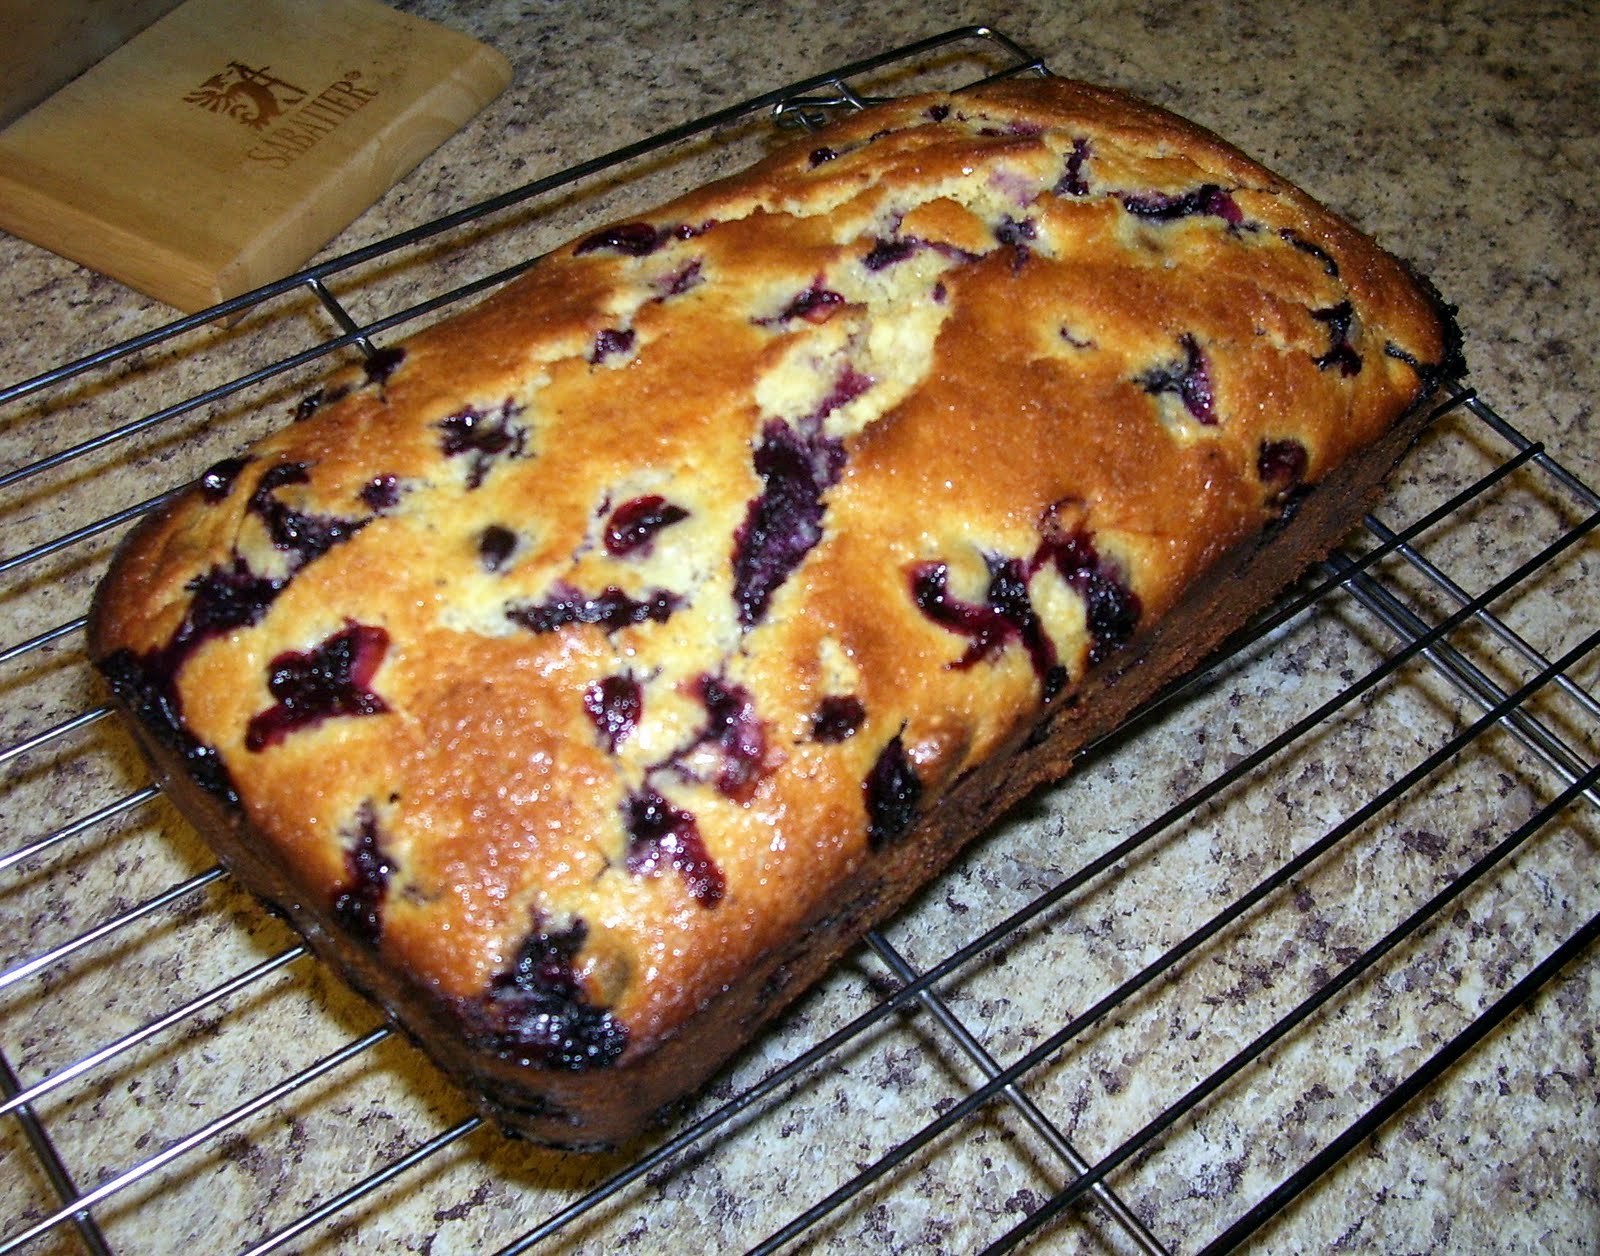
blueberry lemon bread

It’s still blueberry season here at the roost, which means it’s time to get creative and discover new ways to eat those delicious berries! I’ve already posted quite a few blueberry recipes, but this one is something new.


I’ve always loved the combo of blueberry and lemon, so I hunted down a blueberry lemon bread recipe. It needed a little tweaking to come out to my liking, but the results were decadent. You might be thinking, “Ummm…Hattie, you posted a blueberry bread recipe last summer.” And you would be right.
However, that particular bread has a wonderful muffin-like texture and is super yummy slathered in butter or cream cheese. It’s a great breakfast bread.

This bread is like dessert. It has a denser texture and an amazing lemon glaze.


To make this yummy treat you will need:

- 1 cup sugar
- ½ cup butter slightly softened
- 2 eggs
- 1/3 cup milk
- 2 cups flour
- 1 and ½ teaspoons baking powder
- ¼ teaspoon salt
- 1 cup blueberries
- 2 teaspoons grated lemon peel

For glaze
- ¼ cup lemon juice
- 1/3 cup sugar

Cream sugar and butter and beat in eggs one at a time. Mix in milk. In a separate bowl, combine dry ingredients and stir into creamed mixture. Fold in blueberries and lemon peel. Pour batter into greased glass loaf pan. Bake in a preheated 350 degree oven for 50 to 60 minutes. When five minutes is left on the baking time, make lemon glaze by stirring lemon juice and sugar in a small sauce pan over medium heat until sugar dissolves. When loaf is done, use a skewer to poke holes throughout and slowly pour glaze over top. Let cool for ten minutes before removing from pan.

Yum!

I'm linking this to Gina's party!

<3
Hattie

Thursday, July 22, 2010

blueberry blast

Yesterday, I took a little trip up the road driveway for some blueberry picking at my parents’ house. This year they have a bumper crop of organic berries and don’t want any to go to waste.


To keep out the critters, my dad and brother constructed this blueberry house from PVC pipes and netting.


The base is wooden edging


Zip ties hold the netting to the PVC frame. It seems to be working great, because the berries are plentiful and gorgeous.


Yum!


The ripe berries are blue (well, you knew that part already!), yield slightly to the touch, and fall easily from the stem.


If you have to tug to get the berry, it’s not ready yet.

Now, what to do with all those berries? My mom suggested that I freeze some for the winter.


To freeze berries:
- Remove any stems or blemished berries

- Wash berries well

- Line cookie sheets with paper towels or clean dish towels

- Spread berries in a single layer on towels and allow to dry thoroughly

- Place berries in freezer bag and remove as much air as possible.

- Berries will freeze nicely and not clump together

Freezing is great, but the instant gratification of a warm, gooey, blueberry treat is also hard to pass up.

I recommend:


Blueberry Betty


Blueberry Bread


And Super Blueberry muffins.

I made these for the first time yesterday from a recipe my mom found in the local paper. They are a-mazing!

You Need:
- 1 and ½ cups flour
- ¾ cup sugar
- ½ teaspoon salt
- 2 teaspoons baking powder
- 1/3 cup vegetable oil
- 1 egg
- 1/3 cup milk
- I cup blueberries

Crumb topping:
- ½ cup sugar
- 1/3 cup flour
- ¼ cup butter
- 1 and ½ teaspoons cinnamon

For the muffins:
Preheat oven to 400 degrees. Line eight muffin cups with liners and fill any remaining cups half-full with water. In a large bowl, mix flour, sugar, salt, and baking powder. Place vegetable oil in a one cup measuring cup and add the egg and enough milk to fill the cup. Add to the dry ingredients and mix until just blended. Fold in blueberries. Fill each muffin cup to the top with batter and sprinkle with crumb topping.

Crumb toping:
Mix sugar, flour, butter and cinnamon with a fork or pastry blender until crumb topping forms. Makes enough topping for two batches of muffins.

Bake muffins for 20 to 25 minutes.

What's you favorite summer berry?


I’m linking this to Gina’s fun party!

<3
Hattie

Wednesday, March 31, 2010

Let them eat cake

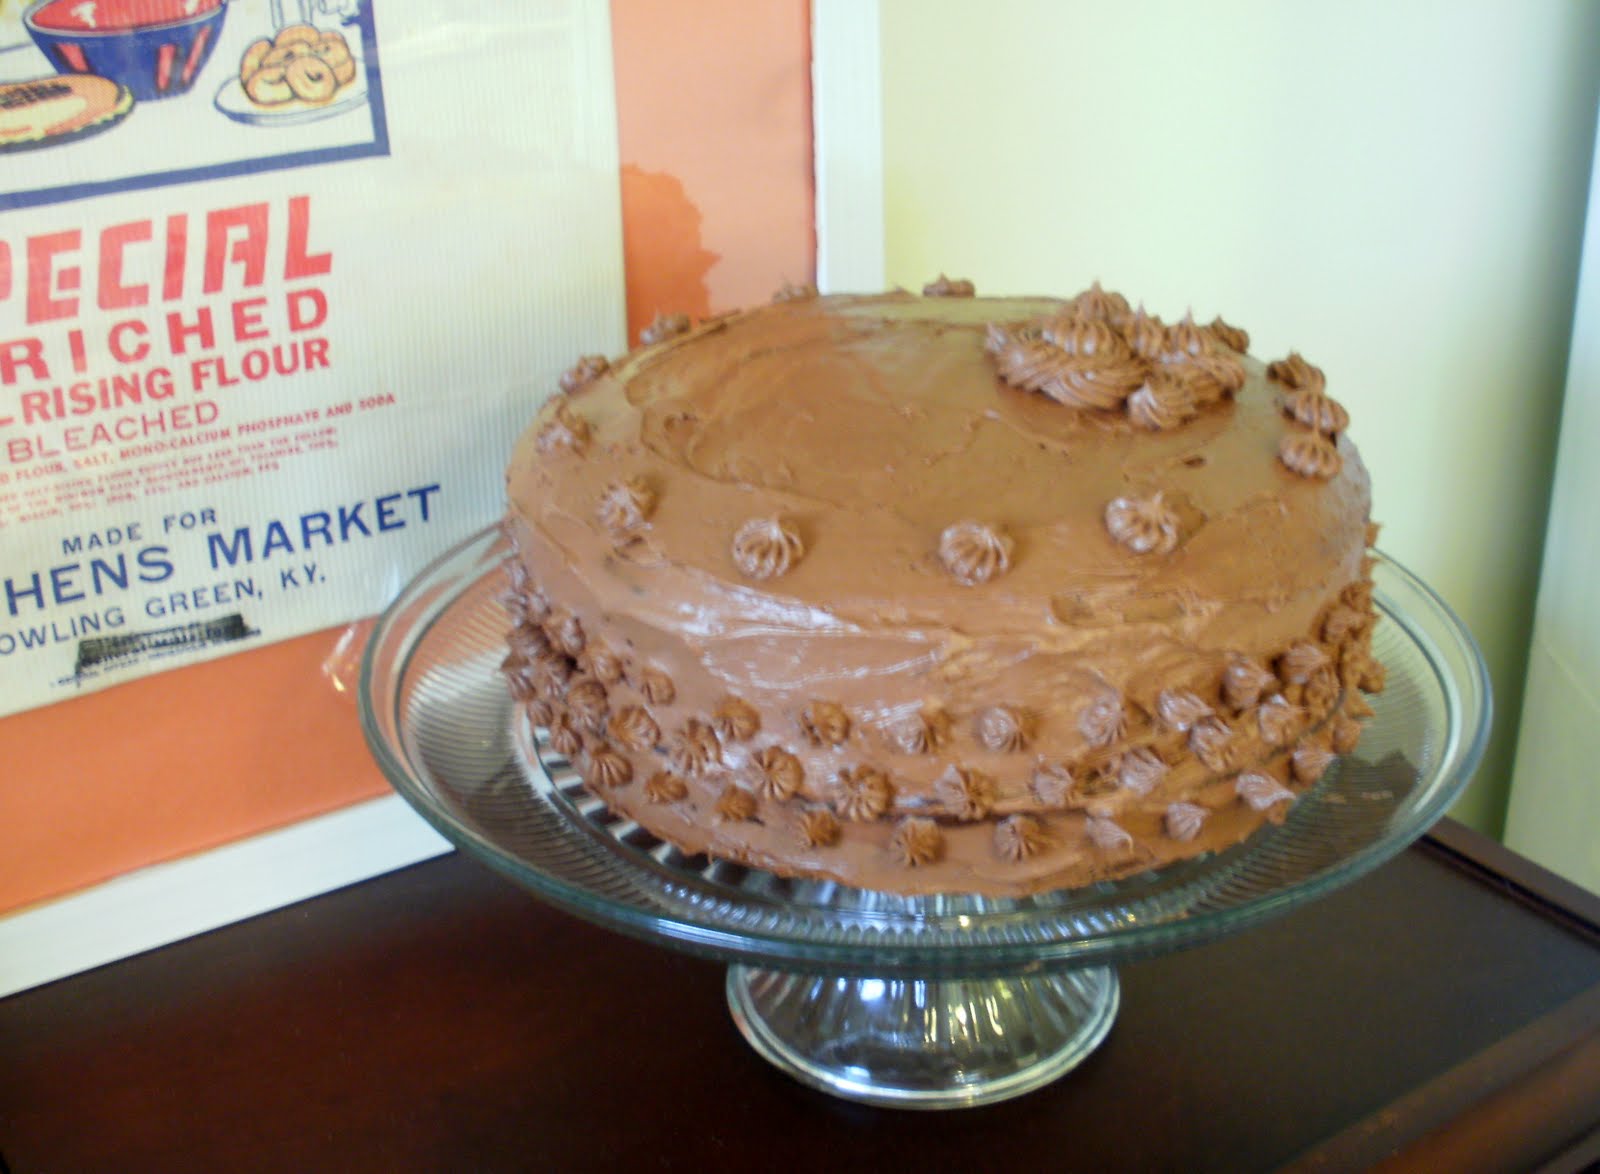
Chocolate sour cream birthday cake, to be presise! One word for you, “Yum!”


If you want to make this scrumptious cake you will need
-1 small box of chocolate pudding
- 1 box of chocolate cake mix
- 1 cup sour cream
- ½ cup water
- ½ cup oil
- 4 eggs

Preheat oven to 350 degrees. Grease and flour two nine inch pans. Mix all ingredients in a large bowl on low for one minute. Scrape the sides of the bowl and continue mixing on low for two more minutes. Pour batter into pans and bake for 30 to 35 minutes. Frost as desired. Since I made this cake for my mother-in-law’s birthday, I went with her favorite (and Brad’s too) chocolate on chocolate!
I tried this tip to keep the cake plate neat. Lay two sheets of waxed paper on the plate.
Place the cake on the paper and frost. Grap the edge of each sheet of paper and quickly pull. Ta-Da! No frosting mess on the edge of the cake plate.
Do you have any great cake tips? Please share!

<3
Hattie

Wednesday, March 10, 2010

Blondies have more fun


I have long been a loyal fan of the family brownie recipe. While I still love the rich, chocolate goodness of a homemade brownie, there is a new kid in town.
Meet blondie. I made these for the first time this weekend, and I. Am. In. Love. If my brownie recipe married the Toll House cookie recipe, they would produce this chocolate chip blondie baby recipe.
Are you drooling yet? OK! I’ll put you out of your misery with the recipe I slightly altered from simplyrecipies.com

You need:

- 1 stick of butter, melted
- 1 egg
- 1 cup dark brown sugar
- 1 cup flour
- teaspoon vanilla
- ½ teaspoon baking powder
- 1/8 teaspoon baking soda
- a pinch of salt
- 1/3 to ½ cup chocolate chips
Preheat the oven to 350 degrees. Butter and flour an 8x8 pan or use baker’s joy. Whisk melted butter and sugar. Add egg and vanilla and whisk again. Add all remaining ingredients, except chocolate chips, and mix. Fold in chips and pour into pan. Bake for 20-25 minutes. Serve warm. Extra points for adding a scoop of ice cream.

Oh, yeah!

<3
Hattie

Thursday, February 11, 2010

I heart chocolate

I don’t think you could call me a food snob, as I would happily eat mac and cheese from the blue box once a week for the rest of my life, but I am a bit of a brownie snob. I refuse to use brownie mix. For one thing, the mix is pretty expensive for the amount of brownies you get out of it. Also, mix brownies never have the right texture. But the biggest reason to never use a mix, is that it is so easy to make amazing brownies from scratch.

This is my favorite brownie recipe, handed down from my mom. I think these were the first things I learned to cook on my own. This recipe makes brownies that are rich, dense, and have that perfect texture that mixes cake-like and fudge-like into something awesome. You can go ahead and put in the nuts, but may I suggest a substitution? My family always adds half a cup of baking chips instead. You can use regular semi-sweet morsels, peanut butter chips, mint chips, raspberry chips, etc. They really make these brownies into something decadent and perfect as a treat for your valentine!

- 1/3 cup vegetable oil
- 3/4 cup sugar
- 2 eggs
- 2 tsp. vanilla
- 1/2 cup flour
- 1/3 cup unsweetened cocoa
- 1/2 tsp baking powder
- 1/4 tsp salt
- 1/2 cup nuts or baking chips

Heat oven to 350 degrees. Grease and flour an 8 inch square baking dish. In a bowl, beat oil, sugar, eggs, and vanilla until well mixed. Add flour, cocoa, baking powder, and salt and mix well. Fold in nuts or chips and pour into pan. Bake for 22-25 minutes

Happy Baking!
 
<3
Hattie

Monday, February 8, 2010

Lemon Chicken

Since Brad and I spent the weekend snowed in with a rapidly dwindling pantry, I decided to try a new chicken recipe I clipped from a magazine awhile ago – mostly because I happened to have all of the ingredients on hand. It turned out to be quite yummy!


Lemon Chicken
- 2 – 6 Chicken breasts
- Olive Oil
- 1 teaspoon cumin
- ½ teaspoon salt
- ¼ teaspoon pepper
- Lemon juice

Use a mallet or rolling pin to pound chicken to ½ inch thickness. Note: do not pound fingers as this will result in shrieking, followed by mad one foot hopping, while clamping mouth shut to avoid unpleasant language – not that I would know from personal experience or anything.

Mix cumin, salt, and pepper in a small plate or bowl. Place grill pan over medium high heat and spray with Pam. Coat chicken in olive oil and rub with spice mix. Cook for about 4 minutes per side. Remove from heat and let chicken rest for 5 minutes.
Shhhhhh! The chicken is resting!

Drizzle with lemon juice and serve.
I really liked the flavor of this chicken. The lemon, olive oil and cumin worked well together to create a light and almost summery flavor. I used the leftovers to make very delicious chicken salad. That said, it didn’t pack as much heat as I expected, so I think I’ll up the cumin next time.

Any other cumin lovers out there?

<3
Hattie

Saturday, January 30, 2010

dreaming of snow cream

There are a few tastes in this world that instantly take me back to childhood. The tangy sweetness of a Bill’s Barbeque lime aid transports me to muggy 4th of July nights, waiting in a park for fireworks to light up the sky. The perfect, buttery, gooey bliss of grilled cheese dunked in chicken noodle soup reminds me of Sunday afternoons spent devouring my Dad’s special super-duper grilled cheese sandwiches. And the cold, creamy sweetness of snow cream takes me to snow days spent making snow angels, constructing snow men, and tramping into a warm house to thaw from my big adventures.


If you have qualms about acid rain or germs, this recipe probably isn’t for you, but if you live with a five second rule, have been known to sample raw cookie dough, and don’t worry too much about a little dirt, you might just love snow cream.

You will need:
- 1 cup evaporated milk
- ½ cup light brown sugar
- 1 teaspoon vanilla
- 8 cups fresh, clean snow

Mix milk, sugar, and vanilla and refrigerate.
I used dark brown sugar, because that’s what I had on hand.

Once well-chilled, dash outside and gather eight cups of snow. Stir cold mixture into the snow and serve immediately. Freeze leftovers.

Yes, it looks like a sandy mess, but it tastes like heaven!

It’s still snowing here, so I might have to make more before the weekend is over! Anyone else remember snow cream? What are your favorite snow memories?

Enjoy!

<3
Hattie

Monday, January 18, 2010

Bithday Boy

On Wednesday, my sweet husband turns 26 (and will no longer be able to tease me for being closer to 30 than 20 without getting it thrown back at ‘em!). We celebrated with our families on Sunday night.


I made a little “party time” banner from some scrapbook paper.

We feasted on Swiss Chicken, Cesar Salad, and Smashed Potatoes. See recipes at the end of the post. Sorry for the lack of pictures, we were too hungry!

The birthday boy or girl gets to eat off of a special plate.

After dinner, Brad opened some presents.


Isn’t he too cute?

He was very happy to have a new golf bag.

We finished the evening with peanut butter filled chocolate cupcakes. Yum!

Happy Birthday to my amazing husband! I love you!
---
Birthday dinner menu:

Swiss Chicken (using 6-10 chicken breasts. Adjust recipe if using more or less, Can be assembled ahead of time)

- 6 – 10 chicken breasts
- 1 slice of Swiss cheese per chicken breast (I used 2%)
- 1 can 98% fat free cream of chicken soup
- ¼ cup dry white wine
- Herb seasoned stuffing mix
- ¼ - ½ cup melted butter

Pre-heat oven to 350 degrees. Place chicken in a greased baking dish. Lay a slice of cheese over each piece of chicken. Mix wine and soup together and pour over chicken. Top with a thin layer of stuffing mix. Drizzle butter over stuffing. Cook for 45 minutes.
---
Smashed Potatoes

- Red skinned potatoes chopped into large chunks (I used an entire bag from Trader Joe’s – about 10 very small potatoes)
- ½ stick butter
- ¼ cup sour cream
- Handful of chopped chives
- Salt and pepper to taste.

Cover potatoes with water and cook over medium high heat until fork tender. Drain potatoes. Smash lightly with fork. Add remaining ingredients and smash until desired consistency.
---
Chocolate cupcakes with peanut butter filling

Make chocolate cupcakes using your favorite recipe. Use these directions to fill with peanut butter filling:

-½ cup of peanut butter
-¼ a package of cream cheese
-1 cup of powdered sugar
- 1/2 Teaspoon vanilla
- 1 Teaspoon milk

Beat peanut butter and cream cheese together. Beat in powdered sugar and vanilla. Add milk to thin. You may add more milk if desired. This makes way more than you need for 24 cupcakes. You could try to half this (although this has already been halved from the recipe I used) or think of a creative way to use the extra.

Enjoy!

<3
Hattie

Thursday, January 7, 2010

oh. my. cupcakes!


I have three words for you, my dear readers: Key. Lime. Cupcakes. Your life will never be the same. Plain ‘ol funfetti cupcakes will be ruined for you forever, for you will have tasted the awesomeness that is a creamy, limey, bit of bliss. I kid you not, these are amazing.


To create these heavenly cupcakes, I played around with a recipe from the cake mix doctor. The original calls for coconut flavoring in the cake and coconut meringue topping. For my version you will need:


- 1 large lime (this is used to create 1 teaspoon of zest and 2 Tablespoons plus 1 teaspoon of juice) you may want an extra lime for garnish
- 4 eggs (1 whole + 3 yolks)
- 1 plain yellow cake mix
- 1 small box of vanilla instant pudding mix
- 1 ¼ cups water
- 1/3 cup cooking oil
- 1 can of key lime pie filling (you only need about a ½ cup of the filling)
- cream cheese icing

Preheat the oven to 350 degrees. In a large bowl add the one egg and three egg yolks. Add cake and pudding mix, water, oil, lime zest, and lime juice. Mix with an electric mixer on low speed for 30 seconds. Scrape bowl and continue to mix on medium speed for several more minutes or until batter is well blended. Line two 12 hole cupcake pans with wrappers and fill 2/3 full with batter. Bake for 18 to 20 minutes. Remove from pan and let cool on wire rack for 15 minutes.

Now for the filling! I used my new Wilton cupcake kit to fill my cup cakes with key lime pie filling. I’ve also heard you can use a turkey baster to do this.

To fill the cupcakes, simply insert the tip of your icing bag or turkey baster about halfway into the center of the cupcake. Squeeze until the filling just reaches the top of the cupcake.

Finish your cupcakes off with a swirl of cream cheese icing.

I used a Wilton 1M decorating tip. For this look, draw a circle of icing just in from the edge of the cupcake. Going the opposite direction, draw a smaller circle of icing on top of the first circle. Finish by ending in the center with an extra squeeze of icing and pulling straight up.

Look at all the lovely icing and filling! I think my 2010 healthy eating plan is in big trouble.

If you could create your own ultimate cupcake, what would it be like?

<3
Hattie

Monday, December 28, 2009

Give me some sugar


Happy DIY Day! I hope you all had a very merry Christmas! Today, I thought I’d share a very special recipe with you all. If you love sugar cookies, you MUST try this recipe because these are the absolute best sugar cookies I have ever tasted. I am not kidding. Plus, this recipe does not call for the dough to be chilled, so you don’t have any of that pesky waiting around.


I made Christmas shapes, but now that the holidays are over, you could make snowflakes and snowmen or hearts for Valentine’s Day.
---
Roll-Out Cookie Dough

1 cup butter (I used smart balance 50/50 blend with no problem)
1 cup sugar
1 large egg
2 teaspoons baking powder
1 teaspoon vanilla extract
3 cups flour

Preheat oven to 400 degrees. In a large bowl, cream together butter and sugar. This is a job for your mix master or other electric mixer. Beat in egg and vanilla. Add baking powder. Mix in flour one cup at a time. You will need to mix in the last bits of flour by hand as the dough will be very stiff. Divide dough into two balls. On a floured surface, roll each ball into a circle about 1/8 inch think. Cut into shapes and bake on an ungreased cookie sheet for 6 to 7 minutes or until very lightly browned.

Tips: These are great plain or with sprinkles. I fill a cookie sheet with only one shape at a time. This keeps smaller shapes from burning. Check the first batch after 5 minutes as baking time really varies depending on your oven. This is my most favorite cookie to have with a cup of tea or coffee! Enjoy, but be warned, these are addicting!

<3
Hattie

Monday, November 9, 2009

potato power

DIY Day @ ASPTL


Tonight I took my DIY Day skills to the kitchen and whipped up some sweet and savory oven fries. Fair warning, these suckers are addicting!


To make your own two serving plate of yummy goodness you will need:


Several baby red potatoes
One large sweet potato
Olive Oil
Rosemary
Savory
Pepper

Preheat the oven to 350 degrees. Slice potatoes. Brad likes it when I use the wavy cutter, but plain slices work fine.


Coat potatoes with olive oil and a few shakes each of rosemary, savory, and pepper. Line a cookie sheet with tinfoil and spray with Pam. Spread potatoes evenly over the cookie sheet and bake for 20-25 minutes until slightly crispy on the outside, stirring halfway through bake time. Enjoy!


Optional dipping sauce: mix equal parts honey and mayo for a sweet and tangy sauce. It tastes weird by itself, but it’s delicious with the sweet potato fries.

If you missed the big announcement yesterday, be sure to check out all the details for my first blog party!

<3
Hattie