

Friday, December 24, 2010
Thursday, December 23, 2010
Last minute gift ideas!
With Christmas Eve around the corner, I thought I’d share a few last minute gift ideas I’ve been whipping up the past few days.

These also make lovely gifts for January birthdays, when the thought of darkening the door of a mall is still too fresh in your memory!
I’ll admit that these are very Anthropologie inspired, but I have yet to meet a girl who is not in love with that store!

This was super simple to make! All you need is a chain, several jump rings, a key (I used a vintage skate key) and some beads.
Place the key on a large jump ring. Use smaller jump rings to attach funky beads to the large jump ring. Thread the whole thing on a chain and you’re done!

On to the Mixed Metal Initial Necklace:

For this one you will need a chain with large links, jump rings, a decorative jump ring (mine is actually intended to be a jewelry closure) beads, a small ribbon, and a bit of leather.


These also make lovely gifts for January birthdays, when the thought of darkening the door of a mall is still too fresh in your memory!
I’ll admit that these are very Anthropologie inspired, but I have yet to meet a girl who is not in love with that store!
First off, the Unlock the Love Necklace:

This was super simple to make! All you need is a chain, several jump rings, a key (I used a vintage skate key) and some beads.
Place the key on a large jump ring. Use smaller jump rings to attach funky beads to the large jump ring. Thread the whole thing on a chain and you’re done!

On to the Mixed Metal Initial Necklace:

For this one you will need a chain with large links, jump rings, a decorative jump ring (mine is actually intended to be a jewelry closure) beads, a small ribbon, and a bit of leather.
Start by cutting an initial from the leather. I used a square from a very ugly purse I found at Goodwill. Since my leather was white, I used a green/gold pen to color it in. I went over the ink with clear nail polish to make it water proof-ish. Poke a hole in the top of the letter with a pin and thread on a jump ring. Now, take your decorative jump ring and attach a few pretty beads with smaller jump rings. Most of my beads were from vintage necklaces so they already had little wire loops attached. You can also make loops by threading your bead onto a jewelry stick pin and twisting the ends with needle nose pliers. Hook everything to the chain with more jump rings and add a little bow for fun!

Finally, the Spring is A-Coming Pin:

You will need one medium circle and 12 smaller circles of felt for the flower, scraps of felt for the leaves, a safety pin, and a needle and thread.
Your medium circle is the base for your flower. Take eight of your smaller circles, fold into quarters, and stich to the base circle with the pointing ends facing towards to center of the circle and the ruffled ends meeting the edge of the circle. Take three more of the small circles, fold into quarters, and stich in the center of the circle to fill everything out. Cut two leaves from a scrap of felt and sew to the back of the circle. Take your last small circle and stich to the back of the felt flower to cover all your crazy stitches.

Now, blanket stitch a safety pin to the back of the flower.

I hope these ideas inspire you! They were all, “create while watching a Christmas movie and drinking hot chocolate” kind of projects! If you have a great last minute gift idea, please leave the link in the comments!
<3
Hattie
Tuesday, December 14, 2010
Would you like to see my etchings?
Hello, blog friends! Wanna fun, classy, and personalized gift you can make in less than 30 minutes?


To get started, stick a strip of painter’s tape to the cutting board. Scotch tape your image over the painter’s tape. I used the font numberpile to print out these fun numbers. Next, slowly cut out your image with the craft knife.

Very carefully peel off your painter’s tape stencil and stick it on your glass. Press down firmly to really seal the tape edges. I stuck on a little extra tape for good measure. Now, use a cheap brush to glop on an even layer of etching cream. I started by leaving the cream on for a little over a minute and it did not etch evenly. I found that 5 minutes worked really well. Important! Rinse the cream off under running water, do not wipe it off with a towel – it makes the etching look funny.

There ya go, an easy peasy project that looks pretty nifty!

Cheers!
<3
Hattie

I knew I wanted to make personalized glasses for one of my friends, but I couldn’t decide how to personalize them. I thought about painting a fancy shape in chalkboard paint so the glasses could be personalized for the occasion (think about the fun: names for parties, seasonal doodles, etc.) but I couldn’t determine if the paint was washable. Next, I thought about buying glass paint, but drawing is really not my crafty forte, and I didn’t want my friend to have to give me one of those awkward “thank you – but what am I going to do with this hideous object that you made me” smiles. I was running out of ideas when Young House Love posted a glass etching project! Aha, something fun and crafty with minimal drawing skills needed!

To make your own, gather: Armour Etch cream or another brand (head’s up Richmonders, this is the only etching cream at Michael’s. I found out the hard way that Ben Franklin, Target, and Wal-Mart don’t sell any etching cream at all), wide painter’s tape, scotch tape, a craft knife, a cutting board, and an image to trace.

To get started, stick a strip of painter’s tape to the cutting board. Scotch tape your image over the painter’s tape. I used the font numberpile to print out these fun numbers. Next, slowly cut out your image with the craft knife.

Very carefully peel off your painter’s tape stencil and stick it on your glass. Press down firmly to really seal the tape edges. I stuck on a little extra tape for good measure. Now, use a cheap brush to glop on an even layer of etching cream. I started by leaving the cream on for a little over a minute and it did not etch evenly. I found that 5 minutes worked really well. Important! Rinse the cream off under running water, do not wipe it off with a towel – it makes the etching look funny.

There ya go, an easy peasy project that looks pretty nifty!

Cheers!
<3
Hattie
Monday, December 13, 2010
Christmas Tour of Homes 2010

Christmas at the Little Red Roost from Hattie Smart on Vimeo.
Now, on to the photo tour!

Let’s start in the living room where the sofa and bookcase great you as you walk down the stairs.

I added a little Christmas cheer with this vintage style card and a print from the Graphics Fairy I trimmed in glittery book pages.

A few stacked books, a candle, and a little wreath make for a simple coffee table centerpiece.

I decided to hang the stockings from the big bookcases this year.

I used a little greenery to jazzy up my faux metal ‘S.’

A little more greenery peeks out from my milk glass bowls.

Here’s our cute and tiny tree!

On the way up the stairs, a family of snow people greets you.

Some homemade glitter snowflakes add a little bling.

In the kitchen, my silver feather tree adds some retro fun.

Here’s a shot of the eating area.

Some fishbowls, candles, and greenery make up the table centerpiece.
So that’s what Christmas looks like at the roost this year! Stop by later this week for some quick and easy DIY gift ideas!
<3
Hattie
Saturday, December 11, 2010
Freaky Weekend
This morning, Brad and I woke to the sound of birds. When we looked out the windows, our yard was coveres with a sea of black birds. I ran for my camera, because I knew no one would believe just how many there were. Trust, me when I say about half of them had moved on before I was able to start filiming. This was seriously the most freaky thing I've ever seen in my yard!
Create your own video slideshow at animoto.com.
What's the weirdest nature experiance you've ever had?
<3
Hattie
Create your own video slideshow at animoto.com.
What's the weirdest nature experiance you've ever had?
<3
Hattie
Tuesday, December 7, 2010
There's no business like snow business


Vintage book page glitter snowflakes! I made three garlands of these flakes to jazz up my snowmen display.

The snowmen were lonely without any snow friends to play with, so I grabbed my go-to source for vintage paper, this yellowed thesaurus.

First, I googled “how to cut a paper snowflake” because I’d forgotten my first grade snowflake skills.

Then, I cut out fifteen snowflakes in various sizes.

I spread out some waxed paper and brushed glue on the edges of the flakes, then I sprinkled them with fancy glitter and let them dry.

After the first side dried, I repeated the process. I used white thread to string the snowflakes together.

I love how they add some sparkle to the hallway!

<3
Hattie
Monday, December 6, 2010
Weekend Christmas Fun
Sunday, Brad and I enjoyed our annual trip to Williamsburg to celebrate the Grand Illumination with our friends Tracy and Tim.

In addition to enjoying very yummy and very unhealthy food,

and finding crafty inspiration in the gift shops,

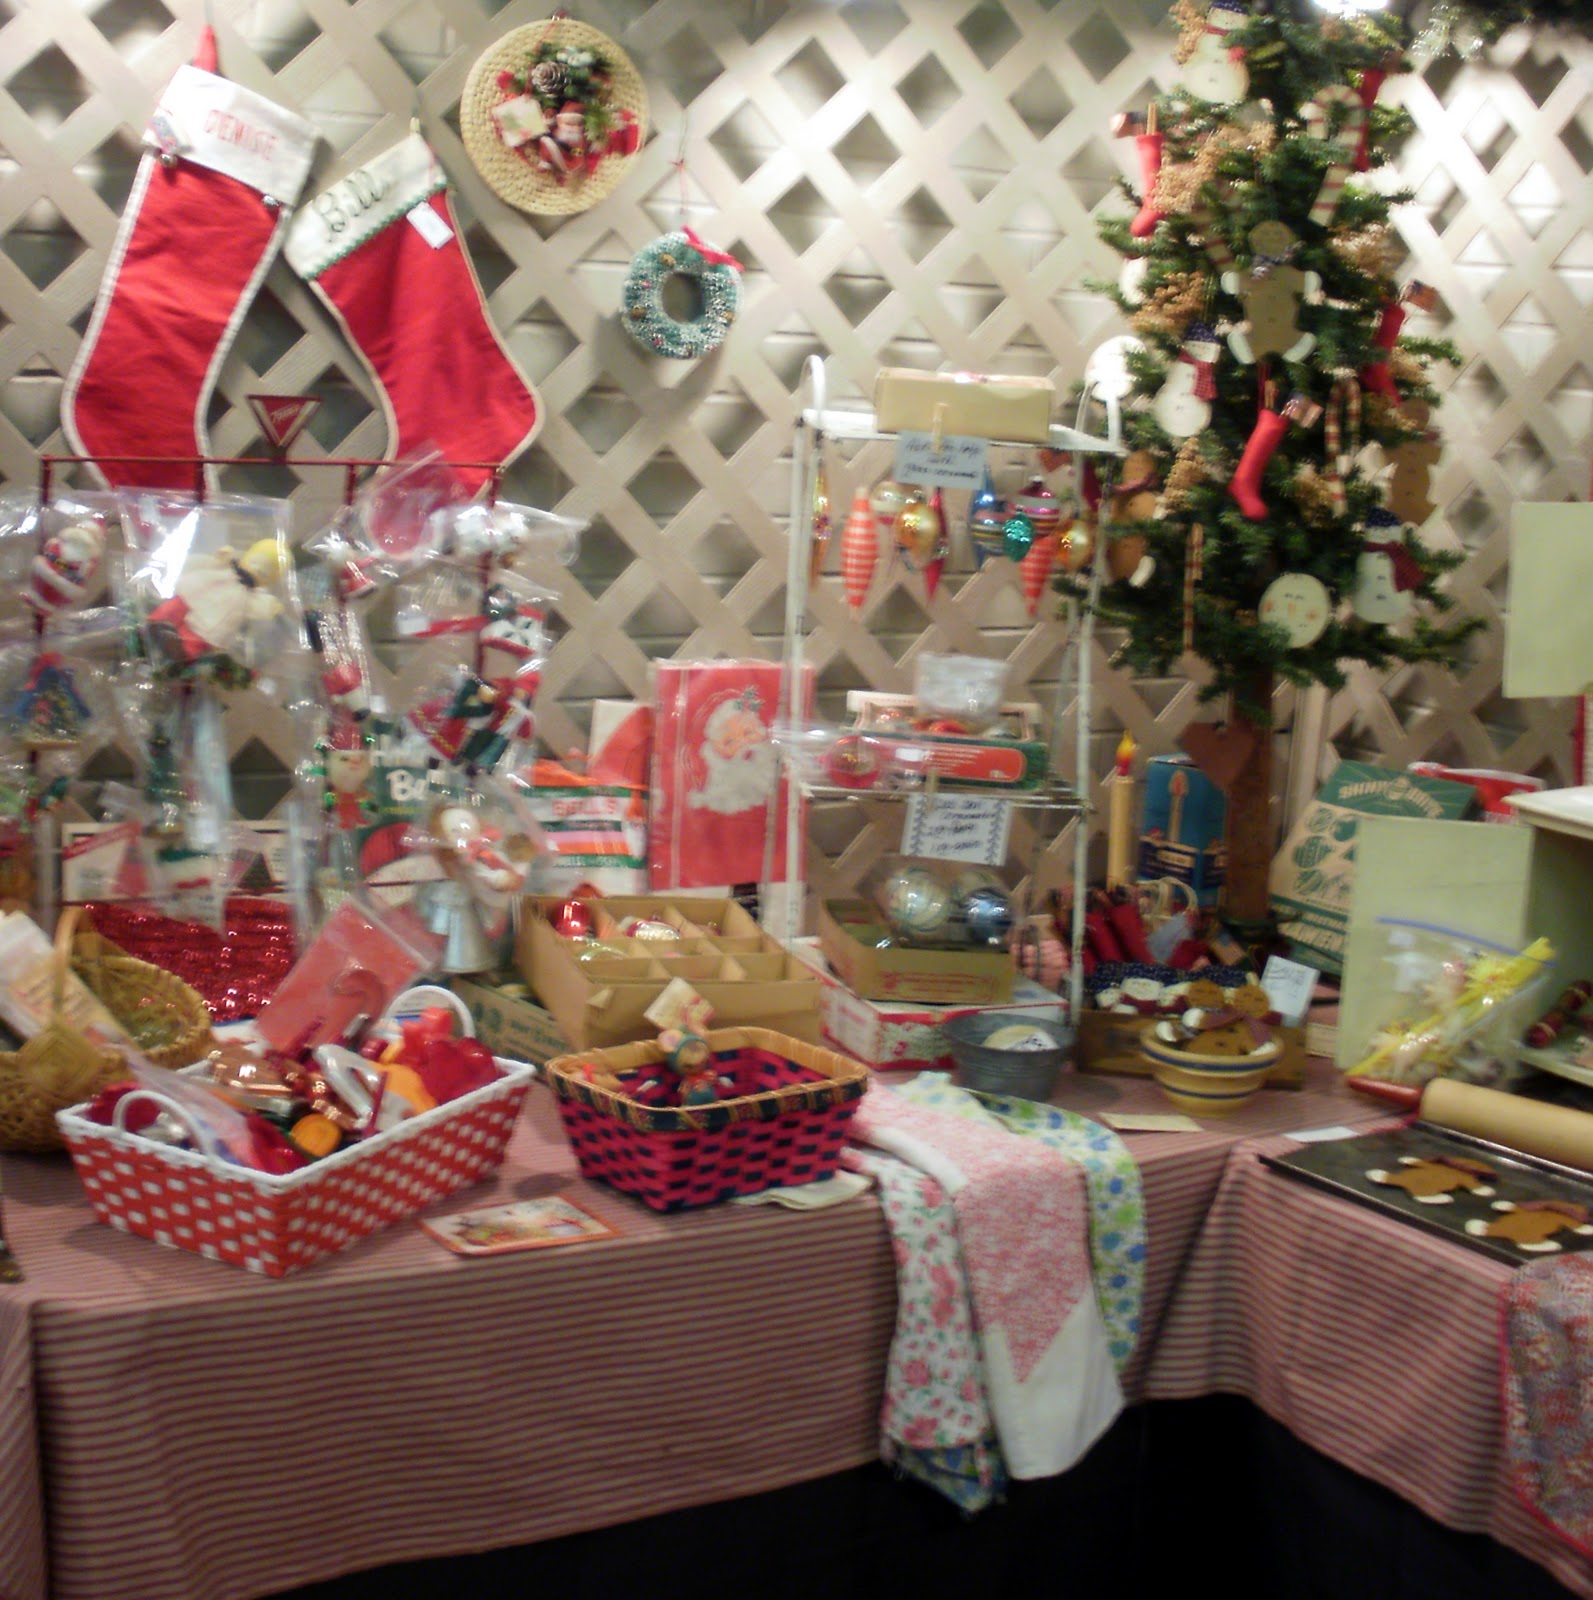
we also stopped by my parents’ booth at the arts and craft fair.

Their booth looked way too cute not to snap a few pictures.

I love how they used an antique snack display stand to hold bags of Christmas ornaments.

My mom shares my love of vintage ornaments and ephemera,

I love the cute elf on my dad’s newest tin cart!
We had such a lovely afternoon, topped off by beautiful fireworks and a trip to Starbucks on the way home!
Did you have a Christmassy weekend?
<3
Hattie

In addition to enjoying very yummy and very unhealthy food,

and finding crafty inspiration in the gift shops,

we also stopped by my parents’ booth at the arts and craft fair.
Their booth looked way too cute not to snap a few pictures.

I love how they used an antique snack display stand to hold bags of Christmas ornaments.

My mom shares my love of vintage ornaments and ephemera,

I love the cute elf on my dad’s newest tin cart!
We had such a lovely afternoon, topped off by beautiful fireworks and a trip to Starbucks on the way home!
Did you have a Christmassy weekend?
<3
Hattie
Wednesday, December 1, 2010
Welcome the season
Let the countdown to Christmas begin! Today I put up the advent tree I made last year.


What are your favorite ways to get in the Christmas spirit? I also love reading The Best Christmas Pageant Ever aloud every year and drinking peppermint mochas!
<3
Hattie

The light was already fading when I got home, but I still snapped a few pictures of the tree’s new location.

Last year, the tree lived on our hall table, and Brad knocked into it (or was attacked – it depends on who you ask) every time he ventured downstairs. Anyway, to prevent further tree angst, this year I moved it into the kitchen. We read the first verse this evening and officially welcomed Christmas into our home!
What are your favorite ways to get in the Christmas spirit? I also love reading The Best Christmas Pageant Ever aloud every year and drinking peppermint mochas!
<3
Hattie
Subscribe to:
Posts (Atom)