Monday, April 19, 2010

Light it up

For me, DIY Day turned into more of a DIY weekend/week/month/never-ending bedroom transformation. It started with the duvet cover, then came the pillows, and this weekend I tackled covering the lamp shades and some new art (stay tuned tomorrow for the art).


I love red, really, I love it. But I’ve never really loved these lampshades. For starters, they are cranberry, not a true red. Brad and I bought them at Lowe’s when we were first married and I remember having a semi-fight in the lighting aisle that went something like, “These aren’t really the right color.” “Well, buy the right color.” “They don’t have it.” “Well, just pick something! They’re just lampshades!” So, we bought the lampshades. This was before I learned that it’s better to enter Lowe’s knowing exactly what you want or leave your husband in the power tools aisle. Anyway, after three years, I decided to cover them.


To cover your own shades, make a template by tracing with a pencil as you roll the shade 360 degrees from the edge of the seam. Do this for both the top and the bottom. I found that an opened grocery bag was the perfect size for my template.


Cut out the template, adding about ½ an inch or so all the way around.

This is a good time to try wrapping the template around the shade to make sure it fits okay.

If all is good, pin the pattern to your fabric and cut out.

Use spray adhesive to attach the fabric to the lampshade. I won’t kid you, this was the hardest part for me, spray adhesive and I are not best friends. Once you wrangle the fabric on the shades, it should look something like this.


Next step, roll the edges of the fabric to the inside of the shade and secure with hot glue.

To give the shade a finished look you will need ribbon or seam tape. I made my own seam tape by folding and gluing long strips of matching fabric.

Very carefully, glue the seam tape to the inside edge of the shade to hide the raw edge. I suggest going slowly and gluing small sections at a time to keep everything nice and even.


And there ya go!


I like the way the lamps give off a warm reddish glow when they’re on.


It’s nice and cheery.

But I also love the plain linen look when the lights are off.


Although this was time consuming, I’d do this project again in a heartbeat!

Plus, I only sustained one hot glue burn which has to be some kind of record for me!

Happy DIY Day!

<3
Hattie

Sunday, April 18, 2010

Preview of coming attractions

I went on a project binge this weekend. Suddenly, I had all these ideas for things I wanted to make and accomplish, and I wanted to do them all right then and there.

For one thing, I took down almost all the art in our bedroom and created some new stuff.


You’ll being seeing some of this later this week.


Some of it you won’t see again until I create a gallery wall in our stairwell.

I spent a loooooooong time looking for just the right images and highly recommend both The Graphics Fairy and Vintage Printable.

I also spent a loooong time covering the shades of both lights in our bedroom. You’ll be seeing those tomorrow.

Then, I spent some time with paint. A lot of time, actually.

Just to top things off, I managed to get ideas for two dress refashions I want to make next weekend and a few more ideas for our bedroom, which is quickly becoming a total makeover project.

So that was my weekend: paint, spray adhesive, hot glue, paper, fabric, three kinds of scissors, pins, an iron, and only one tiny burn my finger.

How did you spend your weekend?

<3
Hattie

Thursday, April 15, 2010

A little spring fluffing


Hello, lovely readers! Spring has brought out my nesting/fluffing/freshening up instincts, so I thought I’d show you a few of the minor changes I’ve made around the roost.


First, as long time readers know, I can’t leave my kitchen table alone for more than five seconds. I love to change up tablecloths and centerpieces. It’s a sickness really.

Tempted by some of the prettiest carnations I’ve ever seen at Trader Joe’s, I opted to go simple with a vase of pretty posies and a cheery vintage cloth.


I also added a plant I bought at IKEA and will probably kill soon.

 I love plants and this leafy little guy won my heart, but given that I belong on the plant killer’s most wanted list, his days are probably numbered.


In the living room, I couldn’t resist filling my favorite Ball jars with more fresh flowers.

Don’t you just love how a few flowers add so much class and life to a room?


Finally, I realized I’ve never shown you my newish huge green jug.


I love the color so much! But trust me when I say that this thing is HUGE.

Our house is so tiny, that this was the only place to stick it, but I love it and I don’t care that much that the scale is a little off.

Does spring make you crave fresh arrangements? What are your favorite nest fluffing tricks when the weather turns warm?

<3
Hattie

Tuesday, April 13, 2010

Bedding makeover part two

Well, I know you were all waiting on pins and needles to see what I was going make with the extra fabric leftover from my duvet cover turned blanket cover, or at least I deluded myself into thinking that you have that level of anticipation for my little projects.


In any case, the wait is over.


As much as I loved my old canvas ruffle pillow, I think I love my two new pillows a million times more. I made them using the same super easy envelope style pillow cover technique, and added a fun double ruffle down the front.

To make a double ruffle, cut a strip of fabric nearly twice as long as the length of your desired finished ruffle. Hem the edges if you’re worried about fraying.

Now, set your sewing machine stitch length to 5 and your tension to 8. Sew straight down one edge and the machine will automatically ruffle the fabric. Repeat on the other edge of the fabric and you have a super easy and super cute double ruffle.


I am now in love with our bed. It feels so calming and inviting to me.


I think I may have started a mini bedroom makeover craze, because I’ve mouse cookied myself into thinking I need to add a bamboo shade to the window.


I’m also thinking of replacing some of the art with some vintage fern prints.


And, what do you think about covering the lampshades in the same linen fabric I used to make my cuff bracelet. I know the red looks kind of nice with the little vignette I have going on for the pictures, but trust me when I say that a red tea cup and breakfast tray does not permanently reside on our bed.


So, without that extra pop of red, would the shades work better in a more neutral fabric?

What do ya’ll think?

I’m linking this up to DIY DAY because you ladies give the best and sweetest advice!

<3
Hattie


Monday, April 12, 2010

Do you Duvet?

The combo of an IKEA trip and Kimba’s DIY Day proved to be just the motivation I needed to make a fresh and modern duvet cover.


Sort of… Here’s the story.

Brad very sweetly gave me this pink Nap blanket for Christmas a few years ago. It’s the perfect size for a snuggly blanket, but it’s pink and nothing else in our bedroom is even close to pink. For awhile now I’ve been planning to make a duvet style cover for the blanket to give it that extra something and add a punch of color to layer over our full size white duvet. I’d planned to make the cover from a pretty sheet set, but I never came across cute and affordable printed sheets.


Enter this twin size IKEA duvet cover. I fell in love with the print and decided it would probably be much easier to alter an existing cover than it would be to make one from scratch.


I laid the duvet cover out on our bed, and placed the blanket on top, with the long edge of the blanket lined up with the edge of the duvet with the premade opening. I trimmed off the excess fabric along one side, leaving about an inch for seam allowance.

I had a ton of extra fabric on the other end of the blanket, and I also trimmed this to leave about an inch for seam allowance.

Next, I turned the duvet cover inside out, folded the raw edges over twice, and simply sewed a straight line. Before I turned the cover right side out and inserted the blanket, I sewed the duvet opening closed a bit more so the blanket would be less likely to fall out. I also added ribbon ties to help keep the cover closed, but still easy to slip off for washing.

Here’s a closer view of the ties


This was a super easy project and turned a ho-hum blanket into something special.


I’m really happy with the results and the way the new blanket gives our bed some much needed color.


If you have a blanket that doesn’t match or is just plan ugly, don’t feel like you have to go out and buy a new one, try your hand at a simple duvet cover instead!


I had a lot of extra fabric, so check back tomorrow to see how I used it to add even more fun to the bedroom!

<3
Hattie

Sunday, April 11, 2010

I'm Back!

Well, spring break has come to an end. It was wonderful to catch up on sleep, spend time with Brad, get stuff done around the house (projects coming soon) and take a lovely trip to IKEA. We came home with a few new little treasures, but I also took some eye candy pics for you.


Like a lot of blogland, I’m gaga over the white EKTORP sofa, but this charcoal grey number really had me smitten. Maybe it’s the comfy array of pillows, or the sophisticated lines, but I fell for this sofa big time. My heart still belongs to white slipcovers, but I could see this fitting in perfectly in our dream home’s library.


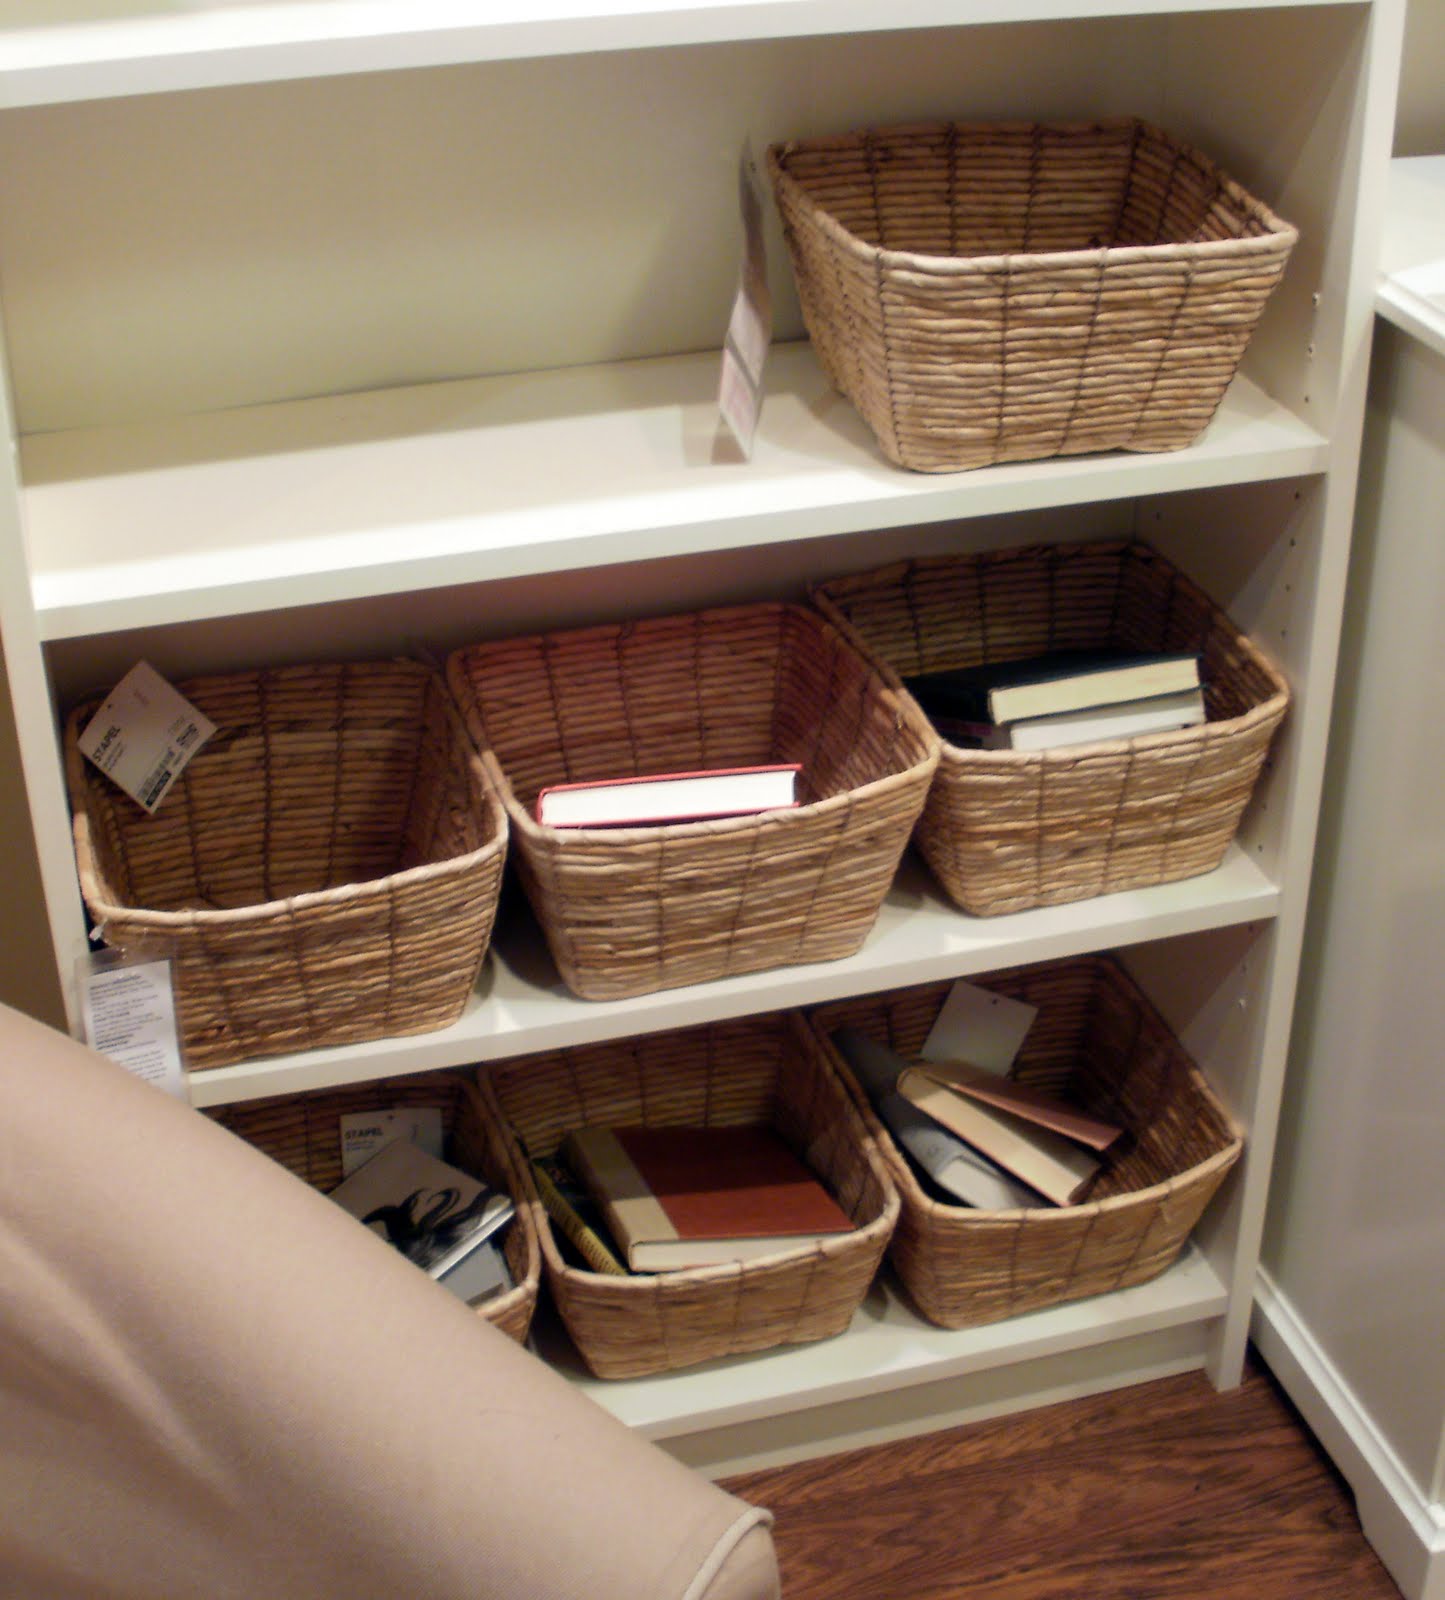
In the “why didn’t I think of that?” category, I love the idea of casually tossing a few books in gorgeous baskets like these. Sigh…I wish I’d taken a few home with me.

I think it must be the red that drew me to this vignette. It’s much more modern than my usual style, but those punchy red chairs and whimsical basket lights had me thinking fun indoor picnic.

Finally, I bring you my semi dream kitchen, or at least my dream cabinets, island, and sink combo.


We currently have these bead board cabinets, and I like them enough to want to use them again in our dream house.

Ok, I don’t love the lights (although I have the exact style hanging over my kitchen table and love it there), blinds, valance, or backsplash. BUT – I love the double apron-front sink, butcher block counters, and cool panel that blends the dishwasher seamlessly with the rest of the cabinets.


Mmmmm, cabinets and counter space!


I really heart this butcher block island, and kind of even dig the hanging pot rack.


I’m a huge fan of these corner shelves. I already have the bottom version of these, but I would love to one day have the upper and lower. They add fun display space and a really finished look.

I know this was a very mini virtual tour of our IKEA trip, but I hope you had a little fun tagging along. Any IKEA favorites of your own?

<3
Hattie

Monday, April 5, 2010

Spring Break!

Today kicked off a week of spring break for Brad and I! This year, we are going to treat it as just that – a break! We’ve had a stressful school year so far, and I’ve been dealing with some health issues, so it’s time for some real rest and time together. Since last summer, I’ve tried to blog at least 3 times a week and usually more often than that. But – this week I’m taking a break from blogging too. I think I need some perspective, less time in front of a screen, and more time enjoying the beautiful weather. I think you’ll get along without me just fine, but I didn’t want to just disappear for a week without any notice :-)


I hope your Easter was as beautiful as ours was!
My sister, brother, hubby, and me!

Happy Spring!

<3
Hattie