Tuesday, June 30, 2009

I'm a Basket Case!

It's super secret project reveal time!

Brad and I have a problem. We live in a tiny little cottage, and we have a lot of stuff. We've done a pretty good job of weeding out old clothes and childhood memorabilia that we don't absolutely need, but we still have a ton of books and movies. OK, I have a ton of books, and Brad has a ton of movies. To compound this problem, we only have two closets in the whole house. One is packed with clothes, and the other is full of Christmas decorations, camping supplies, tools, etc. So, storage is an issue. To further compound this issue, I find that I dislike clutter and adore hidden storage more and more with every year of my life.
- - -
I tackled the book issue back in January with my very first blog post. Although I'm still excited about the day we build our dream home with a big library, I'm pretty happy with the way our books are displayed for now. Of course, once one thing is all nice and organized, anything still cluttered sticks out like a sore thumb.


Notice how the book side is all nice and streamlined, while the DVD and game side is a big, junky mess! Let's take another look:


I shudder.
- - -
I've been scheming since January for a way to make our DVD storage civilized. I originally thought I would buy some of those gorgeous natural fiber baskets you can find at Target and Bed, Bath, and Beyond. When I discovered that those suckers are anywhere from nine to twelve bucks a pop, I put the baskets down and walked away quickly.

A month or so ago, One Pretty Thing featured a basket woven from strips of newspaper. Eureka! A solution to my problem that was practically free! I'm not going to rehash the basket weaving directions that others have already explained so clearly, but at the end of this post, I'll list the modifications I made and some other tips.
- - -
Here are the fabulous results of three full days of basket weaving!


One more look!


I'm really, really pleased with the results! I also like how our games stack much neater on the tallest shelf. Part of me would still like to find another way to store the games. I've thought about finding matching containers to hold each game and then throwing the boxes away, or just painting the boxes a solid color. I'm really tempted, but I think I might regret it down the road when we can easily store the games in a closet. Any thoughts?
---
Let's take another look at the baskets!


If you plan to make these yourself, here are my tips and suggestions.

1. Read the directions I've linked to above.

2. I wanted my baskets to be pretty sturdy, so I used twice as much newspaper per strip. Meaning, I did not cut my newspaper into half sized sheets. I kept the sheets full sized, and folded into eighths lengthwise. I suggest stapling each end of the strip after folding.

3. My baskets are the perfect length and depth to hold a DVD, and they are long enough to reach the back of my 11 inch bookshelves. If you would like to make a basket this size you will need: 7 strips made by folding a full sized sheet of newspaper into eighths lengthwise (if you would like a shorter or longer basket, just remove or add strips. each strip = about one inch in basket length), 5 strips made by folding a full sized sheet of newspaper into eights lengthwise, and stapling half of another strip to the end of each strip so that each completed strip = one and a half the length of the strips you made in the first step. Weave these strips together to make the rectangular bottom of your basket. You will then fold each strip up and weave around the rectangle to form the sides of your basket. It takes 6 full sized strips stapled together to form three long strips to create the sides of your basket. This means that the sides of your basket are three strips tall.

4. Hot glue and staples are your friends. Use both liberally if you want your basket to hold a firm rectangular shape. I used staples where I could hide them and hot glue in the more vi sable areas.

5. Glue a solid sheet of paper to the bottom of your basket if you are worried about the newsprint rubbing off on your bookshelves.

6. This is not as complicated as it sounds. Once you start weaving everything makes sense.

7. What have you got to loose? Old newspaper is free!


I've thinking about adding a solid color ribbon around the middle of each basket. Will this dress them up a little or distract from the simple graphic vibe they've got going right now?

<3
Hattie

Monday, June 29, 2009

Get Your Free On!

Confession: I've been working on a big secret project (OK, it's not that big) and I'm almost finished. If all goes well, I'll post the finished product tomorrow. I'll only give y'all three hints. 1. this project does not involve white paint. 2. our bookcase full of DVDs looked so junky I cringed every time I looked at it. 3. both of my hands are covered in black ink smudges.

- - -

So, in the style of my hero, Mr. Rogers, "Let's think of something to do while we're waiting!" Here are my current 3 favorite, absolutely free, things to do on the web.

1.

One Pretty Thing


This site is dedicated to scouring the web to find the best DIY and craft projects. Each day, about twenty different projects are featured. I have found some of my best ideas on this site! I was so excited when Rachel featured my no-sew sink skirt that I jumped up and down like a college kid on The Price is Right.

2.

Kraft Foods


On this site, you can sign up to receive the free Kraft Foods and Family magazine that is always chock full of great easy recipes and coupons. You can also sign up to receive email recipes from Kraft. Or, you can just browse the site to find something yummy. I do all three! I've tried a lot of recipes from this site and they are almost always awesome. I especially like checking the user rating on a recipe for tips on substitutions and adding extra ingredients.


3.


The Graphics Fairy


Every day, the Graphics Fairy features a free vintage image. A lot of them are a little more Victorian than my style, but I've still found tons of free images that I love. Go ahead and browse through her posts, I bet you'll fall in love with at least one image!

Have fun browsing these great free sites. Be sure to let me know if you've found any amazing free places to hang on the web!


<3
Hattie

Friday, June 26, 2009

One Hot Betty

Blueberries are in season!

I love this antioxidant rich, sweet little, fruit. I like blueberries plain, in cereal, in pancakes, and in smoothies. But, my favorite way to eat blueberries is in a Blueberry Betty.


I think the rest of the known world calls this blueberry cobbler, but in the country we call it Blueberry Betty.

My mom has the best recipe for Blueberry Betty - it even beats out a recipe from Southern Living that I tried last summer, so you know this is good stuff.

__________________________________________________________________

You will need:
4qt blueberries (More or less. I bought one of the big containers they have at Trader Joe's and used half of that.)
1 Tbsp. Lemon Juice (I'm all for changing up recipes, but the lemon juice is VERY important in this case. Don't leave it out.)
1/2 tsp. ground cinnamon
1 cup flour
1 cup sugar ( you could use Splenda)
1/2 cup very cold butter cut into small pieces ( I use the Smart Balance 50/50 blend)

- - -

Rinse berries under cold water. Drain, and place in a 1 1/2 qt. casserole dish. Sprinkle with lemon juice and cinnamon. In a food processor fitted with a metal blade, place flour, sugar, and butter, pulsing on and off until reaching the consistency of coarse meal. OR if you are like me and feel too lazy to go in search of the food processor (buried in the back of the scary cabinet that is packed so full of kitchen gadgets that things fall on top of you every time you open the door) you can put your flour, sugar, and butter in a mixing bowl and cut the ingredients together using two knives or that butter cutter inner mixer thing - Google tells me it's called a pastry blender.
Sprinkle the coarse meal over the berries. Bake in a 375 degree oven until top is golden brown, about 45 minutes - it's not a bad idea to check after about 40 minutes.

- - - -

Serving suggestion: cool for a few minutes and serve with a big scoop of vanilla ice cream. No one will judge you if you have the leftovers for breakfast the next morning.

Note: you can half this recipe, just put everything in a smaller casserole dish or a glass loaf pan.

Enjoy!

<3
Hattie

Wednesday, June 24, 2009

vintage goodness

I had to show y'all the adorable vintage tablecloth my parents gave Brad and I for our anniversary.
It just has "summer" written all over it! I love how the red, blue, and green pick up all the colors in the kitchen. The blue especially helps the blue glass bottle and the blue in the framed flour sack pop out amidst all the red.
I didn't think my little woven lemon worked as well with this tablecloth as it did with the cloth that used to be on the table, so I borrowed from another room for a new centerpiece.
This lovely red glass is actually a wasp catcher, but I love it too much to hang it outside. It used to reside on the hall table, but I'm really liking it on this saucer as a centerpiece. I'm thinking that if I play around with it enough, I should be able to figure out how to get a candle to stand upright inside the glass for a little extra glam at dinner time!
<3
Hattie
Tuesday, June 23, 2009

Two Years

Today's post is going to be a little different than normal, so if you have an aversion to mushy stuff, look away now! Brad and I have been married for two years today, and I have to say that they have been the best two years I could have asked for. Not only is he an amazing husband and friend, but he is also always willing to help me in whatever projects I cook up. I'm so thankful to have a husband who loves me enough to grab a paintbrush or pick up a hammer and join me in making our little roost feel like home. Brad is always happy to battle the Northern Va traffic for a day trip to IKEA. He will follow me into Pottery Barn and Crate and Barrel anytime. And maybe the most surprising thing (but very appreciated!) is that he will often vacuum the whole house just because he knows it will make me happy! Needless to say, I love this man very, very much!
Here are some of my favorite moments from the big day, as well as some of the more unconventional ways we chose to make our wedding special.
This was taken the moment I joined Brad on stage. I think you can tell how happy I am!
Our first kiss as husband and wife.
Leaving the church and feeling like a million bucks!
_______________________________________________________________
Now, on to some of the ways we saved money and made our reception special.
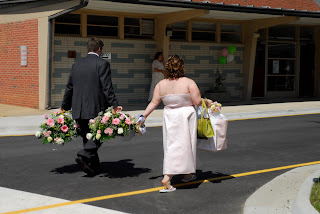
After the ceremony, we moved all the flower arrangements from the church to the reception hall so they could still be enjoyed for the rest of the afternoon.
When we found out we couldn't dance at a church reception, most of the other wedding venues in town were already booked. My dad had the great idea to hold the reception at an elementary school a few blocks from the church. It was kind of fitting because Brad and I are both teachers. My whole family worked so hard to transform a school cafeteria into a garden party themed reception.
One of my good friends from high school donated her beautiful floral talents as a wedding present. The bouquets were simple, gorgeous, and perfect.

Another friend of the family gave us his incredibly creative catering skills as wedding present. When we told him we were planning a garden party theme, he came up with the idea of using sod on the buffet table. It was very, very cool.

We continued the theme by placing picket fences around the buffet and dance floor. My dad put these together for us because he is the best!

Our precious flower girl peeking over the fence.


First dance!
We also begged and borrowed garden benches and chairs from everyone we knew to provide additional seating.


My parents rented plants and palm trees from a local garden center to provide extra color.

One of my favorite parts of the reception was our Krispy Kreme "cake." Brad took me to a movie and Krispy Kreme on our first date and we knew early on that we had to have a doughnut cake at our wedding.

My mom scoured the Internet for the stand.


Yummy!

The hat thing didn't work out too well with my veil. . .


Our guests LOVED the doughnuts, and people still talk about how cool our cake was.


I'm so glad we decided to move the reception to a place where we could dance, because we spent most of the afternoon twirling on the dance floor.


Everyone had so much fun!

We escaped in a flurry of bubbles.
As you can see, our wedding was not the fanciest or the most traditional, but it represented who we are and what we value the most. We were able to invite all the friends and family we wanted and spend an afternoon celebrating with them. Our whole day was a team effort and would not have been possible without help from a lot of our friends and family. At one point I think every member of my family helped me cut, fold, and glue the handmade pocket fold invitations!
So, happy anniversary to my sweet, cute, precious husband, and many, many thanks to all the people who got our marriage off to a special and creative start!
<3
Hattie

Monday, June 22, 2009

wedding bells and wedding shoes

This weekend, Brad and I enjoyed a wonderful stay in Lynchburg, VA. Josh, one of our good friends from college, tied the knot in nearby Altavista, so we decided to make a weekend of it.
We drove down early on Saturday and met up with our friends Tracy and Tim in historic downtown Lynchburg. We spent the afternoon ducking in and out of antique stores full of dusty furniture with both great bones and great prices. Tracy captured our fun afternoon on her blog close to home. After a few hours trekking up and down Main Street, Brad and I were super grateful to check into our hotel for a little freshening up before the wedding. We stayed at the Craddock Terry, a shoe factory turned boutique hotel in the historic distract.
The shoe theme runs (ha ha) throughout the hotel and includes a mixed media mural in the lobby, an antique shoe shine station tucked underneath a stairwell, and a unique shoe sign on every guest room door.
As soon as we entered our room, we noticed another cool use of shoe paraphernalia.
Each guest room is equipped with an old fashioned shoe shine box used to serve breakfast. The night before you simply fill out a card with your breakfast preferences, put it in the box, and place the box outside your door. In the morning, your box is filled with yummy goodies. we enjoyed bagels, local blueberry muffins, organic yogurt, orange juice, and fruit.
.
The guest rooms have a wonderful urban meets traditional feel. Each room has a beautiful exposed brick wall
The floor to ceiling window let in the afternoon light.

Most of the furniture is handmade by local artisans.

I fell in love with this gorgeous sage velvet sofa.

But I fell even more in love with the bathroom.

soooo nice!

I also loved that all the bath products were organic. We really enjoyed our stay and would recommend this hotel for any future romantic getaways!
Saturday evening we ventured down the road to Altavista for Josh and Becky's wedding. The couple exchanged vows in an outdoor ceremony at the Avoca Muesuem. The historic home was the perfect backdrop for their simple ceremony.

The new Mr. & Mrs.
Brad and I think the happy couple chose a pretty special June weekend, because we were married on the same weekend two years ago.

Tracy and Tim think so too, because they were married on the same weekend four years ago!
Smiling for the camera. . .

Although, this is a much more realistic shot of the two of us!

What a fun weekend! Congratulations to the Bride and Groom!

Thursday, June 18, 2009

a little birdie told me

As of today, I'm officially enjoying almost two months of summer vacation! This hopefully means I will be able to post more often! Today's post is a two-in-one deal. Part one: another present wrapping idea. Part two: a little paper or cloth birdie tutorial.

When I showed y'all how I wrapped my sister's graduation present, My dear friend Tracy's mom brought up a super common wrapping dilemma:
"Tracy's mom said...
Your presentation is beautiful and I know Hannah will appreciate it. Seems like every time I have a gift to wrap, it never fits into a convenient shaped anything and I agree that unwrapping something is so much more exciting, but I always end up using a bag. :( Any suggestions?"
Why, yes! Suggestion number one: if possible, try to fit the gift in a more normal shaped container. It never hurts to have a few shoe or shirt boxes on hand for this purpose. This is also a great way to foil present guessers. If you don't have a box on hand, or your gift just won't fit in a box shape, you can always try suggestion number two: the good old gather and tie.
Yup, this idea also relies on my good friend, half priced Christmas tissue paper. I used this method for the adorable little birdies I bought as end of the year, "thank you for being amazing" gifts for my library co -workers.
I found these cuties at Hallmark. Obviously, they are awkwardly shaped. To avoid the ubiquitous gift bag, I wrapped each one in tissue until they took on a pear-like blob shape. Next, I centered my blob on three sheets of stacked tissue, grabbed the edges, gathered them together, and tied the whole shebang off with some pretty ribbon.
Now on to part two: how to make the sweet little birdie on the gift tag! You can make your birdie out of paper to use as an embellishment on gift tags and cards (very precious with messages like: "a little birdie told me it's your birthday." or "a love note for the love birds.") You could also frame your birdie for some cheap-o art. I've also made several of these birdies out of fabric. The are very cute hanging from pegs, or from a tree branch in a vase.
First you will need a pattern of some sort, here is the one I use. You can see that I have several size and shape options that I have tried. If you don't want to use or modify this bird shape, there are tons of clip art birds available that might inspire you.

Next, choose three different paper or fabric patterns - one for each bird part. If you don't have patterned paper on hand, magazines and Pottery Barn catalogues usually have pictures with lots of texture and pattern that are great to use.

Arrange your birdie bits to taste (OK - that sounds like gross cooking instructions, but you get what I mean!) and glue or sew in place.

If sewing, you can vary your stitches for added interest. I like to alternate between the blanket stitch and a running stitch . If you're making the paper version, you might want to draw some stitches to give your birdie a little more interest.
Here are my little fabric friends hanging in the entryway. I might make some more in summery colors.
A little close up love.

These are crazy easy to make, so if you are as enamoured with birdie decor as I am, go and sew and/or glue a whole flock for your nest!
<3
Hattie